Remote Servers
For the past several years, I’ve been working on data-science/research projects, starting in the industry and a couple of undergraduate assignments and more recently by doing research as a graduate student. As someone who likes a convenient environment, I always like to improve the way I work and automate routine dull processes. In this first post of mine, I’ll describe how I make my environment more convenient to work with.
The setup with which I work with contains the following components:
- My personal computer (linux distro)
- A gateway machine
- Remote servers
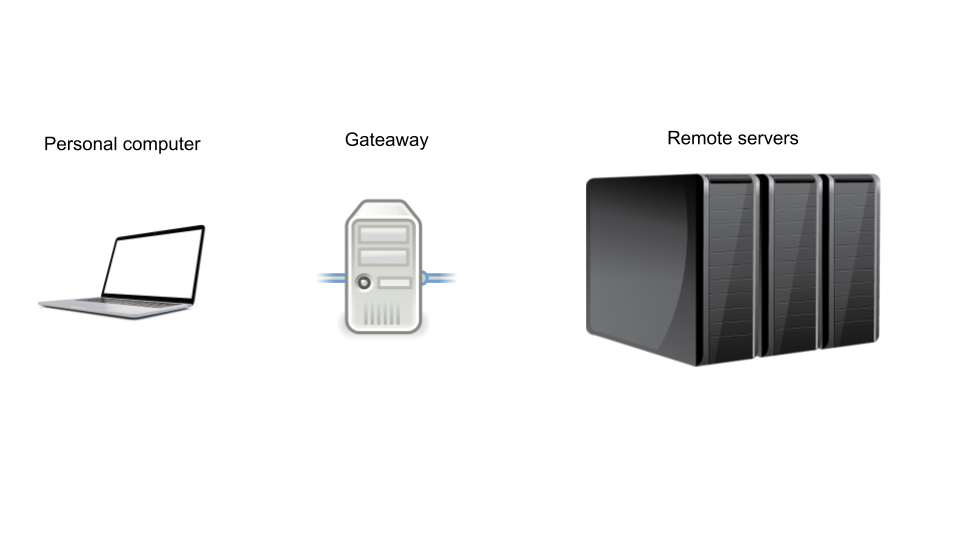
As I usually work on computational greedy projects, the usage of my laptop is out of the question. Therefore I need a constant connection to those machines. For security reasons, the remote servers are not directly accessible, meaning they can only be reached by the gateway machine.
The basic way of connecting to the servers is to first connect with ssh to the gateway and then ssh again to the server which requires entering the user and password at every connection. This is rather cumbersome and gets annoying after the first time. We will go through the steps on how to easily connect to both servers with a single command.
Making SSH Great Again
A few words on SSH
SSH (Secure Shell), is a secure protocol, which allows the users to control the server they connect to. The common way of connecting to a remote server using ssh is by the following command: ssh user@host, which will then result in a password prompt. In this post I won’t get into the details on how ssh works, but only assume the basic usage knowledge.
Connect w/o the need of a password
We are going to create an authentication key and transfer the public one to the server we wish to connect to. Let’s begin by setting up the first connection - from the laptop to the gateaway.
We will use a nice little software named ssh-copy. It does all the work for us and all we need to do is to type the following line in a terminal:
ssh-keygen -t rsa  # create an SSH key, if needed.
ssh-copy-id -i ~/.ssh/id_rsa.pub user@host- Linux users should already have this software installed.
- Mac users will need to install the ssh-copy tool by:
brew install ssh-copy-idThe ssh-copy-id command will copy your SSH key to the server, create the appropriate ssh folder, if needed and finally append the public key as an authorized key in the server .ssh/authorized_keys file.
If for some reason this doesn’t work, just copy-paste the following commands, which is basically what ssh-copy does:
Open a terminal and run the following steps:
- Generate a pair of authentication keys. You will be asked to enter a passphrase, which is optional.
ssh-keygen -t rsa- create a
.sshfolder on the remote machine (if it doesn’t exist already)
ssh user@host mkdir -p .ssh- Append the public key you generated earlier to the remote machine (this is the last time you enter your password, hopefully).
cat .ssh/id_rsa.pub | ssh user@host 'cat >> .ssh/authorized_keys'That’s it! from now on you can reach the server easily without the need of a password
ssh user@hostFor reaching the servers machines from the gateway follow the same steps (if it wasn’t already configured).
Convenient SSHing
Now that we got a bit more sophisticated, turns out we can do better. Instead of ssh’ing the whole hostname + username every time, we can make it more convenient - both for the gateway, and the proxied machines.
In the ~/.ssh/config file on the local computer, insert the following:
Host gate
 HostName [gateway.name]
    User [user]

Host work1
 HostName [machine.name]
 user [user]
 ProxyCommand ssh gate nc %h %p
There’s another useful configuration argument called ‘IdentityFile’ that is useful when working with multiple public/private keypairs. Let’s say you have a github account for work, besides the private one, which you use for your personal projects. You’ll need another public-private key pair for it, but you still want a convenient interface with it. Here is an example for how to set it up in the config file:
Host company-github
    User git
    HostName company.github.com
    IdentityFile ~/.ssh/github.comp.key
Each ssh connection will use the appropriate key for the required connection.
We can add all the remote servers in a similar manner, for allowing an easy connection for each server.
Now, a simple command of ssh gate or ssh work1 will bring us directly to the gateway or work1 servers respectively, with no need for any password or another connection.
Tunneling

Now that we have a convenient access to the remote servers, we can use tunneling for achieving a seamless access to the servers’ resources in our computer. This way, we can for example run a Jupyter notebook on a remote machine (with lots of memory) and interact with it on our browser. It allows us:
- To turn off the computer and keep the notebook running on the server.
- To open and access the same notebook even from another computer.
- To keep models loaded on the remote server. Meaning we load once and access forever (or until the admins will perform a restart)
For example if we want to open a notebook on the server work1 on port 9100, we will open a tunnel to our computer on port 9200 with the following command:
ssh -N -f -L localhost:9200:localhost:9100 work1Tunneling with Fun
Now that you know how to set up a tunnel, you would start doing it all the time (at least I do). To give you a real-life example, I am using tunneling mainly for Jupyter notebooks and for Tensorboard. The Tensorboard server doesn’t consume many resources, but the notebooks sometimes do. As I use different machines for different projects (to balance loadings), and therefore different tunnels , I couldn’t recall what port is used for what application, not to mention on which server.
As eventually, we forward to our own machine, the only controled variables are the port numbers, and well, numbers are forgotten quickly. I recently found a partial solution for that. Instead of opening the applications on localhost:xxxx I generated new domain names, which are just forwarding to the localhost host. This doesn’t solve the ports problem, but now as each application gets its own name, there’s no confusion, and after a usage or two, modern browsers will remember the port, so all you have to remember is the meaningful name you came up with.
For doing the domain forwarding, do the following:
- Open the
/etc/hostsfile with sudo:
sudo [vim|nano|...] /etc/hosts- You should have the following line somewhere (probably just at the top):
127.0.0.1 localhost - duplicate that line, and switch the
localhostname with whatever meaningful name you have for your application (for example,tensorboard).
Now you can find your tensorboard application at tensorboard:8100.
I still don’t have a solution to the porting problem, suggestions are welcome.
More Convenient Tips
Keep SSH Open
If you have worked with tunnels for a while, you might have noticed that they tend to not work after several minutes of idle usage. This might be annoying if you are working in parallel on several stuff. This reconnecting issue can be solved quite easily by adding a simple line into an ssh configuration file. This way, every x seconds, a ‘sign-of-life’ signal will be sent to the server. On your local machine, edit the /etc/ssh/ssh_config file (with sudo) and enter the following line after the Host * line:
ServerAliveInterval 120This will apply to all ssh connections. If this might be an issue for you, it’s possible to define it only for specific ssh connections by adding the same line to the ~/.ssh/config config file. It will look something like that:
Host gate
 HostName gateway.name
 User user
 IdentityFile ~/.ssh/gateway
 ServerAliveInterval 120
Automatic SSHing
Now that the tunnels won’t shut down while you’re still working, things look sweet. But then you go to sleep (sometimes we need to), so you suspend/hibernate your computer (we never really turn it off, do we). Next day, you want to go back and work on your notebook, which you work on locally with the open tunnel, but… the connection has closed and you need to reopen it. After a while, you get tired of this either, luckily there’s a solution!
This wonderful program will keep your ssh connection open until you close your computer. But until then, your ssh is safe. So for example, you can put your computer to sleep, disconnect the Wifi etc and once you get back online, this program will do the ssh connection for you.
Install by running:
sudo apt-get install autosshnow run the following command:
autossh -M 20000 -N -f -L localhost:9201:localhost:9100 work1which is very similar to the command we saw before, except the command name (duh) and the -M 20000 flag which is the port where this monitor lives.
IntelliJ Integration
In the Pycharm Professional edition, there’s a great feature of connecting to a remote server and work directly on it. You can either write code on your own computer and just run it on the remote server or to fully sync your whole repository on the remote server.
The interlliJ interface changes from time to time, but the idea is the same. I’ll present the steps for a specific version - V. 2018.1.4.
- Under Pycharm Settings
- Build, Execution, Deployment -> Deployment
- Click on the green + for creating a new Deployment settings
- Enter the relevant information (Name, host, port:22 usually, Root path and username)
Now with a right click on the project folder, under the Deployment key, you will be able to upload, download or sync your project with the remote location (you can also define a shortcut key for that).
For using a remote interpreter:
- Go to the project settings
- Under the project interpreters bookmark, near the Project Interpreter option, there should be a small wheel button, for options. Click on it and then click on ‘Add’.
- On the left menu, click on SSH Interpreter
- Click on the “Existing server configuration” option and use the deployment configuration we created earlier.
- Choose the remote interpreter (e.g anaconda/python)
- and… you’re done!
Acknowledgments
I would like to thank Fred Blain, Hila Gonen, Amit Moryossef, Asaf Amrami and Vered Shwartz for their helpful comments.